Tuesday 29 January 2019

A mixed media card with no colouring


Hi again everyone hope you had a good start to your week.

I have been admiring a lot of mixed media projects on line lately and was keen on trying something out.

This time no colouring was done just stamping and distressing and sticking on lots of things :)


This birthday card is for a colleague of mine. I used a Stempelglede stamp in the centre which I die cut with a Magnolia die.

On it I stuck one of the lovely Laserowelove floral frames.


The Happy Birthday stamp is a Magnolia rubber stamp which I use frequently.

Some shabby chic lace was added on at the lowest part of the card.


This metal cabochon is something I purchased ages ago and use from time to time. The letter A is part of an alphabet die - A is for Alexandra. I used some stickles to make it pop


The cut out butterfly and pinkish rose are from a Mintay paper collection which is adorable.


Flowers, stickles and some metal embellishments were added on as well to match with the cabochon on the side.

Anyhow I love how it turned out and hopefully Alexandra would love it too :)

Love

Claire xoxo


Friday 25 January 2019

Copic colouring tutorial on Magnolia Channel - Cupid Angel Tilda


Hi everyone good morning. A quick one today just to share with you my latest copic colouring tutorial video on the Magnolia Channel.


I have coloured this sweet Cupid Angel Tilda for you.


You can follow the step by step here

Enjoy and if you have any questions feel free to ask away

Lots of love

Claire xoxo

Thursday 24 January 2019

Shabby Chic


Hi everyone good morning and I hope you are all having a great day!

 Back with you today with my next Magnolia DT project with a front frame card which I had been longing to do since last year.

This is a two fold card with a front frame to give the front of the card a little bit more dimension.

I have used several Magnolia dies as well. Used the swedish lace border on the front of the frame - it's a die which I use quite often.


I have coloured the sweet Magnolia Tilda bringing flowers with distress ink and have inked the edges with distress ink frayed burlap. I have used various post stamps to give it a more shabby style.
 

 As you can see from the side the front pops out which makes it quite easy to add on more decorative items. I have used Maja Paper - Vintage Summer Basics for my card today and I have cut out a small postcard and inserted it at the back.


Can you spot the glossy accents on the flowers that Tilda is holding?
Some jute ribbon and a birdhouse charm on the side plus flowers from Wild Orchid Crafts.


The sentiment is also a Magnolia. I have opted to stitch my card base this time.


Did you spot the lovely Magnolia luggage die. I just had to include it in my project. It is quite easy to assemble and it gives your projects/cards a lot of dimension and cuteness I suppose.


Today am also showing you how I decorated the inside of the card. Very basic but used a Stempelglede stamp from Postcard from Paris.


I hope you have enjoyed seeing how I completed my card today and I look forward to sharing with you the next one.

and here are the links to what I have used today:


Take care everyone and stay warm x

Claire xoxo


Tuesday 15 January 2019

Valentine on the way .....


Two posts for you today. I know haha am finally imporoving in keeping in touch with all of you through my blog. One of my 2019 resolutions so far.


Magnolia is my favourite company when it comes for stamps yes true. You might think I'm biaised cause of being a Magnolia DT but really and truly I fell in love with Tilda the minute I saw her on the cover of Magnolia Ink Magazine in 2011. Ages ago now but back then it was even harder for me to obtain all my crafting stuff from abroad as there was no shop that could supply me with all that I need here in Malta.


So bit by bit I started collecting the Tilda stamp collections and bought my copics, some pencils until I learned through youtube videos of how to use copics and eventually distress inks. So you can say I am self taught although I studied Art at school and was always drawing and colouring since I was born you can say :)


Right ..... Valentine is next in line so here for you today I am sharing my 'You Are My Valentine Tilda' which is one of my favourites :)


I have coloured her in with Faber Castell Albrech Durer on Kraft paper.  For extra dimension I used my white gel pen on certain areas.

Let's see what I will come up with for this little lady :)

Have a great day folks x

Claire 

Happy New Year 2019

Hello everyone hope you've had a good start to your year and I wish you all the best of health, love and peace in 2019.


I've been really busy over the Christmas period finishing off various cards for charity and fairs plus family - they expect them every year now :)


Did you order the Magnolia Christmas Advent Calendar? I loved it all! Lots of gorgeousness in one package :)


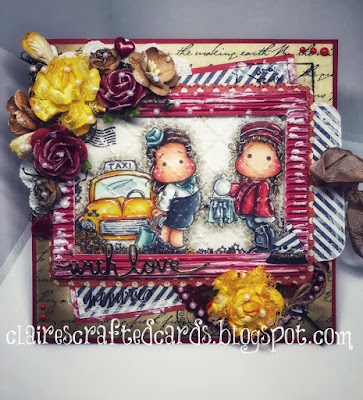
I had to colour these cuties up from the calendar. I have used copics this time. I tend to switch from one medium to another depending on my mood :)


Later decided that I haven't done a shaker card in ages so have used the image as a project for Magnolia DT - my first for 2019


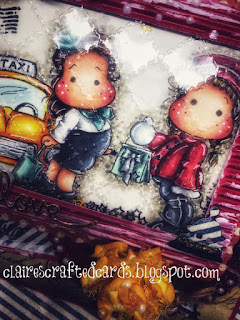
I have filled in the contents of the shaker card with very small stars which I purchased from a local one pound shop.  I have also embossed the acetate for a more shabby look so to speak and give it something different from the normal shaker cards that I do. You can emboss the acetate with any of your embossing folders.


The flowers are from Wild Orchid Crafts mostly but the yellow ones are from Magnolia. I have used liquid pearls to give it a bit more dimension


I have used red base cardstock plus papers from Maja Design - Denim & Friends which I purchased from Magnoliastamps.us


This paper not only is of a very good quality but the design in itself makes it highly usable and fun in your projects so it comes highly recommended by me.

For a bit of a twist I have used a tag that slides out from behind the shaker part of the card


I have used Magnolia dies also from the Advent calendar - can you spot the cloche bell at the edge of the frame? and the metal key is something I had.


Looking forward to share my projects with you as we go along.

Have a great day x

Claire